


Mini Peanut Butter Icebox Cakes
Twin Cities food blogger greens & chocolate shares a picnic perfect icebox cake…served in mason jars for easy transportation!
With a baby on the way any day now, my husband and I are doing everything we can to get all of our favorite summer activities in before the little guy makes his arrival. I think we’ll be good at still getting out of the house once he comes, but we’re still a little nervous about just how much life is going to change. Part of us is all “Our social life isn’t over – we can just bring him to all of the happy hour patios!” and the other part is “We’re never going to have fun again!” I’m thinking we’ll fall somewhere in between?
Since moving to Minneapolis last year (all the way from Saint Paul! ha!) we’ve been wanting to hit up one of the free concerts at the Lake Harriet Bandshell that happen pretty much every night during the summer.
Somehow we managed to get through all of last summer without going to one so we took advantage of a mild summer Saturday evening last week, packed up our picnic baskets and headed to the lake! We also invited my husband’s brother and sister-in-law and his parents to join in on the food and fun.
I offered to bring dessert for the picnic and while I was originally planning to make a full-sized icebox cake, the logistics of bringing a whipped cream based cake, along with our two crazy dogs, seemed a little (ok, a lot) messy. Enter: the beauty of putting things in jars.
Now, I know mason jars are kind of on their way out the door (or even already long gone) as far as being “cool” but you can’t deny the convenience of putting all the things in jars. Salad in a jar? Super easy for lunch. Leftovers in a jar? Convenient for heating up the next day and avoiding yucky plastic containers. Dessert in a jar? Absolute perfection for a picnic dessert. Also, the solution to my messy cake concern.
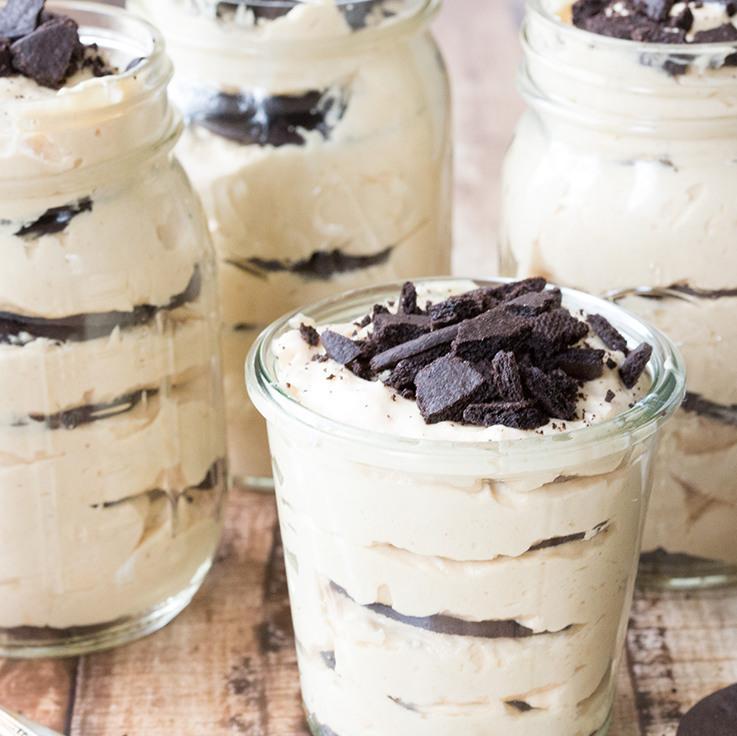
Since we’re all Midwesterners, I’m guessing you’re familiar with icebox cakes, but if not, let’s do a little introduction. An icebox cake is a no-bake confection made by layering wafer cookies and whipped cream.
Sounds good, yes? Then the entire thing is allowed to sit for a few hours and meld together, creating tender cake-like layers from the whipped cream softening the cookies. It’s pretty much pure heaven in the form of “cake.” Since you can’t go wrong with peanut butter and chocolate, I decided to combine the two.
I made the mini icebox cakes in regular sized mason jars, as I knew sharing between us couples would not be a problem, but if you’re making them for a bigger crowd and want more individual-sized desserts, just use the smaller four ounce mason jars. Since it’s a pretty rich dessert, four ounces will be plenty for one person. If the cookies don’t fit perfectly, there’s nothing wrong with breaking the cookies into smaller chunks to get them to fit. Also, if you don’t want to make them “mini” and you’d prefer a regular sized
cake, you can put it in an 8×8” baking dish. They won’t be as cute, though.
They ended up being the perfect sweet treat to our picnic for each couple to share. The peanut butter whipped cream made the chocolate wafers into irresistible soft cake layers, and while the dessert is pretty rich, we didn’t have any problem finishing them off!
Mini Peanut Butter Icebox Cakes (in Jars!)
makes 4 mason jars
Ingredients
- 9 oz. box of chocolate wafers
- 1 pint (2 cups) heavy whipping cream
- 1 cup powdered sugar
- 8 oz. cream cheese, softened
- ¾ cup smooth peanut butter (not natural)
- 1 teaspoon pure vanilla extract
Directions
- In large bowl with electric mixer, combine whipping cream and powdered sugar.
- Beat on high until stiff peaks form. (You know you have stiff peaks when you remove the beater from the cream and the peaks do not curl over.)
- Set whipped cream aside. I transferred to a separate bowl and used the same bowl for the next steps.
- In large bowl with electric mixer, beat cream cheese, peanut butter and vanilla extract until creamy.
- Fold whipped cream into peanut butter/cream cheese mixture until well combined. Try not to be too vigorous with this, as you don’t want to ‘deflate’ the cream cheese.
- To assemble the cakes in jars, layer 2 cookies on the bottom of each jar, and top with approximately 2-3 tablespoons of peanut butter whipped cream mixture. Repeat until each jar is filled.
- Alternatively, you can make this into a full-sized cake in an 8×8” baking dish. Layer the bottom of the baking dish with cookies, overlapping as necessary to cover the bottom. Spread thin layer of peanut butter mixture over cookies, then repeat until all cookies and peanut butter whipped cream is used.
- Refrigerate at least 4 hours, until ready to serve.